Well folks, here are a few recipes in an easy-to-read download.
We hope you enjoy the food and enjoy spending some time with your kids in the kitchen over the next couple of weeks.
We’ve included a full dinner with Falafel Chicken, a simple corn-ham soup, home-made pancakes for a weekend morning and our favorite party-sized quiches which are great for hosting people, but make an easy snack from the freezer to enjoy yourself.
The recipes are broken down into a shopping list and a pantry list – checking the pantry before we go to the store is a great kid-task!
I haven’t specified what part of the cooking is done by the kids, since that will depend a little on your kids’ ages, skills and ability. Generally, I’ve found that measuring, mixing, stirring and fetching ingredients are easy first tasks.
I hope you’ll find some time to get together with your family and test a few of these recipes. Please feel free to pass this along and let us know what you think.
Wishing you many happy meals!
Talia's Table
Sunday, December 19, 2010
Friday, December 17, 2010
Tortellini with Chorizo Sauce
We made this dinner last week, another easy comfort-food dinner, made with pantry and freezer ingredients.
Served with a side of veggies (carrots and zucchini cooked in the microwave), it's a simple but wholesome dinner.
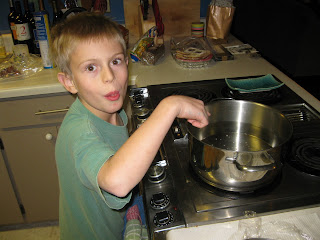
My son wanted to be in charge of dinner, so I directed and he prepared. It was fun, and simple enough that he could do it all himself, starting with salting the pasta water.
I buy chorizo at the grocery store, in the meat section near the hotdogs and hispanic foods, and keep them in the freezer since I never use more than one at a time and they're sold in packs of 8.
One thing we learned the hard (messy!) way is don't forget to pierce the skin of the sausage if you decide to defrost it in the microwave. Ka-Boom!
Of course, that's how my son learned the all-important lesson: when something explodes in the microwave, clean it up right away!
Tortellini with Chorizo Sauce
1 chorizo sausage
1 can (15 oz) diced tomatoes
1/2 cup V8 juice*
1/2 cup chicken broth
1/2 cup diced onions
1 lb dried tortellini
* if you don't have V8, you can substitute a small can of tomato paste and use 3/4 cups chicken broth instead)
Put a large pot of water on to boil, salted and covered.
Brown the sausage in a wide non-stick frying pan. Add the diced onions (you may have these in the freezer if you do this) and cook until the onions are soft. Add the liquids and bring to a simmer.
By this time, your water should be boiling. Add the tortellini and cook according to the package (typically about 11 minutes).
Let the sauce simmer while the pasta cooks. Microwave the veggies and set the table.
Drain the tortellini and add them to the sauce. Mix and serve.
Total preparation time: about 20 minutes.
For the record, it's helpful to actually put the vegetables on the table when you eat, instead of leaving them in the microwave where you will find them the next morning....

Served with a side of veggies (carrots and zucchini cooked in the microwave), it's a simple but wholesome dinner.
My son wanted to be in charge of dinner, so I directed and he prepared. It was fun, and simple enough that he could do it all himself, starting with salting the pasta water.

I buy chorizo at the grocery store, in the meat section near the hotdogs and hispanic foods, and keep them in the freezer since I never use more than one at a time and they're sold in packs of 8.
One thing we learned the hard (messy!) way is don't forget to pierce the skin of the sausage if you decide to defrost it in the microwave. Ka-Boom!
Of course, that's how my son learned the all-important lesson: when something explodes in the microwave, clean it up right away!
Tortellini with Chorizo Sauce
1 chorizo sausage
1 can (15 oz) diced tomatoes
1/2 cup V8 juice*
1/2 cup chicken broth
1/2 cup diced onions
1 lb dried tortellini
* if you don't have V8, you can substitute a small can of tomato paste and use 3/4 cups chicken broth instead)
Put a large pot of water on to boil, salted and covered.
Brown the sausage in a wide non-stick frying pan. Add the diced onions (you may have these in the freezer if you do this) and cook until the onions are soft. Add the liquids and bring to a simmer.
By this time, your water should be boiling. Add the tortellini and cook according to the package (typically about 11 minutes).
Let the sauce simmer while the pasta cooks. Microwave the veggies and set the table.
Drain the tortellini and add them to the sauce. Mix and serve.
Total preparation time: about 20 minutes.
For the record, it's helpful to actually put the vegetables on the table when you eat, instead of leaving them in the microwave where you will find them the next morning....

Thursday, December 16, 2010
Spaghetti and Meatballs
Just in case you think we've been doing nothing but partying, we wanted to pass along these easy meatballs for one of those nights when you need a quick, satisfying dinner.

Cranberry Meatballs
.75-1 lb ground beef (I recommend the 80/20 grind for quick dinners. The 90/10 tends to be a bit dry unless you're cooking the meatballs for a very long time in the sauce.)
1/3 cup dried cranberries
1/4 cup pine-nuts
3 TB ketchup
1/4 cup breadcrumbs
pepper, salt and ground cayenne to tast (typically 1/4 tsp pepper and salt, 1/8 tsp of cayenne)
In a bowl, mix all the ingredients with your hands, then form the meatballs between your palms, rolling evenly sized balls about 1 inch wide.
Heat a large non-stick saucepan with a skim of olive oil. When the pan is hot, add the meatballs and cook over medium heat, shaking the pan frequently, until the meatballs are darkly browned on all sides, about 10-13 minutes, depending on the quantity of meat used and your stove's heat.
Add tomato sauce (we used a jar, but you could make tomorrow's sauce if you're feeling leisurely) and cook until the sauce is thoroughly hot and bubbling. If you're not sure, you can split a meatball open to check for doneness.
Serve over the spaghetti or noodle of your choice. We prefer angle hair for this dish.
Wednesday, December 15, 2010
Window Pane Cookies
If you happened to see the post about our eggnog party, you might have wondered what those lovely, glossy, delightful cookies were up front....
They go by various names, jelly cookies, spitzbuben (their "real" name), or window pane cookies when we make this version with our square cookie cutters. The original recipe, which is swiss or german in origin, used a butter cookie dough, but we usually add some ground hazlenuts to the dough, which makes them more like an austrian linzer tort.
The general idea is to make an equal number of tops and bottoms - they're the same shape and size, but with a window cut out of the tops. Dust the tops with powdered sugar and sandwich some jelly between the layers, and they're good enough to hide a few away when company comes.
What you see here is the last step in the assembly process:


The kids love rolling the dough, sprinkling the tops, assembling and, of course, eating!
You can find other recipes on the web for spitzbuben, but here's the one I've been using, adapted from my mother's holiday notebook.
They go by various names, jelly cookies, spitzbuben (their "real" name), or window pane cookies when we make this version with our square cookie cutters. The original recipe, which is swiss or german in origin, used a butter cookie dough, but we usually add some ground hazlenuts to the dough, which makes them more like an austrian linzer tort.
The general idea is to make an equal number of tops and bottoms - they're the same shape and size, but with a window cut out of the tops. Dust the tops with powdered sugar and sandwich some jelly between the layers, and they're good enough to hide a few away when company comes.
What you see here is the last step in the assembly process:

My mother put a small note on the bottom of her recipe when she passed it along to me that said "do this over the sink." I didn't fully appreciate that note until I sprinkled powdered sugar all over my countertop the first year. That's why we're putting this tip up top! A drying rack over the sink and a small sieve (or you can use a sifter, but I think they're a pain to clean!) makes cleaning up the sugary mess a snap.
We melt the jelly in the microwave, about 45 seconds for a small jar, emptied into a bowl. It has to be cool enough not to run all over the place, but liquid enough to get a smooth, glossy blob on the bottom. You can see from the picture that you want your jelly blob to be just big enough to reach under the edges (think glue) but you don't want it smooshing out the edges. While this takes practice, the up side is you can eat your mistakes.

I bake my cookies on parchment paper for two reasons. It makes swapping out the pans easy, because they're essentially clean under the paper and because you can slide the entire sheet of cookies off your cookie sheet onto the cooling rack. I find I break fewer tops this way.

These cookies are extra work, like any roll-out cookie. I portion the dough into several lumps to refrigerate because it's easier to work your way through a small batch of dough before it gets too warm and soft to handle (and that doesn't make for good cookies either). That said, I always make a double batch, because they are everyone's favorite. Well, they're my favorite!

You can find other recipes on the web for spitzbuben, but here's the one I've been using, adapted from my mother's holiday notebook.
Spitzbuben
2 sticks of unsalted butter, room temperature
1 cup powdered sugar plus more for dusting the tops
2 large egg yolks
2 1/3 cups all-purpose flour (you can substitue up to 1/3 cup of the flour with finely ground hazlenuts but if you use more nuts, the dough will be dry and crumbly. I put the whole nuts in the food processer and run it until they have the consistency of cornmeal)
For the filling: 2/3 cup (1 small jar) seedless rasberry jam. Blackberry jam is also good.
Beat butter with an electric mixer until it is light and fluffy. Add the sugar and combine well. Add yolks beating well after each addition. Add flour and fold in thoroughly. Divide the dough into two equal portions and wrap in plastic wrap. Press it into even squares and refigerate until firm, at least 2 hours.
Preheat oven to 350*. Line two sheets with parchment paper. Lighly flour your working surface and roll the chilled dough out to about 3/16 inch thick. Using a 2-inch cookie cutter, begin cutting tops and bottoms. Tops have a smaller shape cut out. If you don't have ideal cookie cutters, you can use a round biscuit cutter for the larger size and a pastry bag tip or small shot-glass for the center cut-out.
I recommend doing a sheet of tops and a sheet of bottoms so you have the same number of each in every batch.
Put them in the oven, reduce the temperature to 325* and bake for about 12 minutes until they are golden brown. Transfer the parchment paper to cooling racks to cool completely.
Tip: let your cookie sheets cool thoroughly between batches - a warm sheet will begin melting the cookies as you put them on and they will look uneven.
When you're ready to assemble the cookies, follow the instructions above.
The cookies keep well between wax-paper layers in an airtight container for up to two weeks (or so I've been told!) You can also make the cookies ahead of time and freeze them in ziploc bags for a month without powdered sugar or jelly, then assemble when you're ready.
Here's hoping you enjoy your own version of this delicious tradition!
Tuesday, December 14, 2010
Bite-Size Party Quiche
These bite-sized delights are one of the best party foods I've come across. They're mini-quiche in puff-pastry shells. You can make them the day of, you can make them ahead of time and freeze them and they reheat like a charm. They're tasty and you can change the fillings to suit the event. The original recipe I got from my mother has leeks and bacon in it and it's tough to improve on that. But we've made them with leeks and smoked salmon, turkey and no onions, small pieces of ham, or whatever combination suits your fancy!
Two things make this recipe easy. Invest in a few mini-muffin tins. They're not expensive and if you can bake 4 dozen at a time, this recipe is a snap. If you have to wait around for a dozen to bake before you can rinse, cool, and re-fill the pan, this recipe is tedious. Trust me.
The other tip: don't forget to spray the pans. Let me repeat that: Don't Forget to Spray the Pans. You got it, that was the voice of experience speaking. If you forget to spray the pans, the little, lovely, tasty quiches will stick right to them like glue and you will have some pretty ugly little things to plop on a plate for your guests. If you dare. So, with those two things in mind, let's head to the main event.
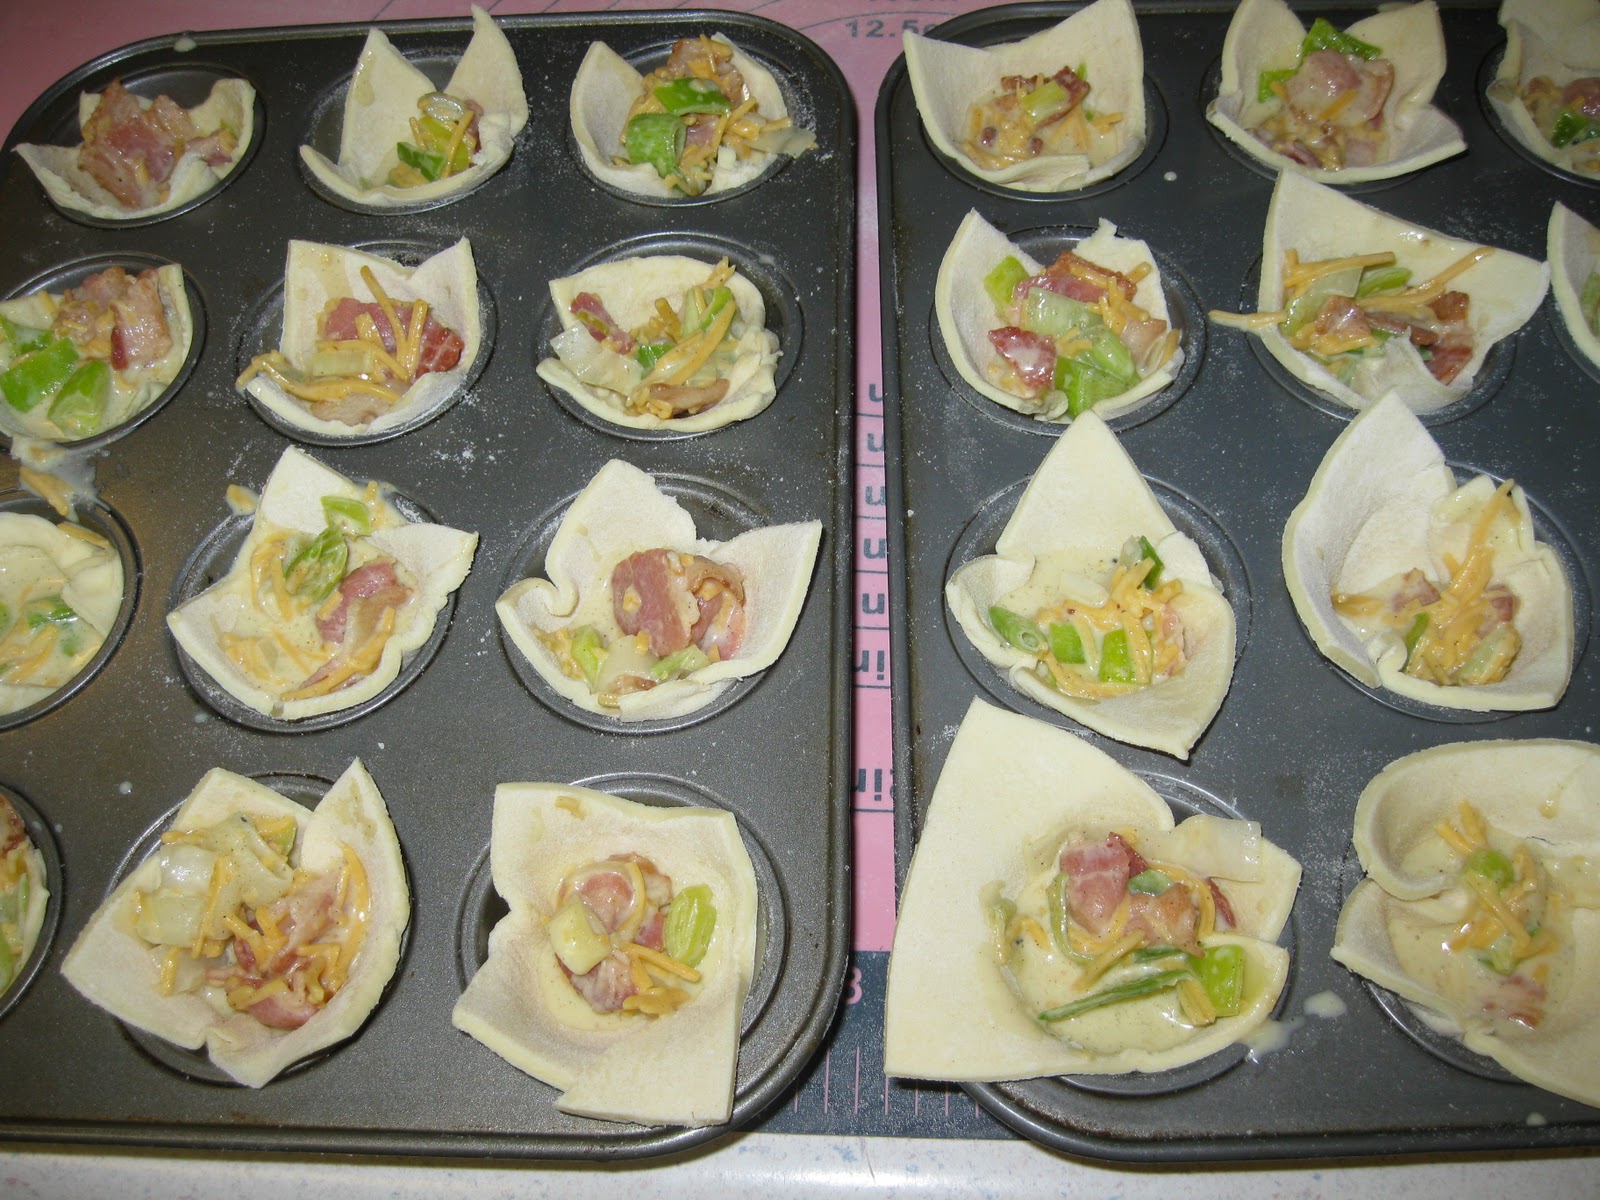
The recipe called for cutting little circular pieces of puff pastry then re-rolling the scraps, like cut out cookies. We use little square (no scraps!) and let the corners stick out. They look home-made and irregular but not a single person has ever said "gee, I wish you'd make those with round edges." So we're okay with that. And it's a lot simpler.

The filling is simple. Some half-and-half, yolks, cheese and savories of your choice. Salt, pepper, nutmeg and you're good to go.

As I said, we made ours with bacon and leeks this year.

If you use leeks, don't forget to slice them and then swish them around in some cold water to get any sand out before you cook them.

We use the tablespoon measuring spoon to scoop the filling and it's the perfect size. They cook for about 12 minutes then you can serve them, keep them in the fridge for a few days or freeze them for up to 3 months. To reheat frozen ones, about 10 minutes on a cookie sheet at 250* will do it.
And we actually did have a couple of scraps left over. So they were sprinkled with a little sugar and baked for about 5 minutes to make some scrappy little cookies. Double the yum!
We'll put the full recipe for these treats in our cookbook download, coming later this week, so check back!
Sunday, December 12, 2010
Did You Miss Us?
Sorry to be away so long, but we were thinking of you. Really, we were! We had our annual Eggnog party last night, so we've been baking up a storm and cleaning house, but we've taken photos along the way and have lots of fun to share with you.


The center piece is always the eggnog, but we noticed this year that the mini-quiche and veggie platter disappeared at an astounding rate. Next year we'll have to make more quiche (and fewer cookies? or just invite more guests!?)
The eggnog is easy - we use the Joy of Cooking's recipe for "Eggnog in Quantity" but there was a similar one in the New York Times dining section just last week.
We'll post some of the cookies and quiche recipes here in the upcoming days, so if you're in need of some party food, check back!
Monday, December 6, 2010
What's your pleasure?
Well friends, we're going to do a little cookbook for you all. A little stocking stuffer for you. We'll probably put a few of our most-visited recipes in a fully-detailed booklet.
What's your pleasure?
What's your pleasure?
Blackened Catfish
I remember sitting with my grandmother in a seafood restaurant when I was about 18 years old, debating the merits of catfish. She loved catfish. I didn't.
"Fried. Or blackened." She declared. As if that was all we needed to know in order to bring the conversation to a close.
"But it's so ... fishy!" I remember countering. I liked fish, shellfish, and lake fish, but catfish always left me feeling like it came from the bottom of the lake.
Perhaps it was all the times my sisters and I teased the catfish in the lakes across the street, tapping the top of the waters, bringing their gaping maws to the surface, like some sort of home-made horror movie. Low budget.
Catfish? No thanks.
Recently however, I came to the conclusion that time has turned the tables. If you buy catfish these days at the grocery store, it lacks that distinctive flavor that my grandmother so enjoyed and I didn't. I think it's because of the farming that has made catfish plentiful and rather mild in flavor.
We made blackened catfish the other night and it was simple to prepare. Cast iron pan, heated hot and lightly coated with some olive oil. Fish filets rubbed with a cajun seasoning. Three minutes per side. Couldn't be simpler.

Served it up with some sauted green beans and rice. Simple, flavorful.
So, grandma, we're enjoying the catfish. Blackened. But I have to confess that for a moment last night I missed that muddy bottom-of-the-lake flavor.
Thursday, December 2, 2010
Pie Weight Stand-In
We were making our pie crusts for Thanksgiving and I was thinking about how long I'd waited to get pie weights. I'd either skipped (with bubbled crusts as a result) or used beans in a pinch (with acceptable, but wasteful feeling results). I finally got a set of pie weights a few years ago and have been very grateful - they work just like they're supposed to and they're always sitting in the cupboard where they belong.
What I didn't do was get two sets.
So, when it was time to bake two empty crusts, I was in a bind. Except, a bright kid saved me. I'd borrowed his bag of marbles to put in the flower vase and when he brought them down I said I planned to use them for flowers.
"Oh, I thought you were going to use them in the crusts."
So I did.

A colleague of mine mentioned the other day how her kids push her to remember to be creative. Add this example to the list!
They worked just as well as the pie weights, so if you've got a jar of out-grown marbles, I recommend moving them down to the kitchen cupboard in a jiffy.
Wednesday, December 1, 2010
100th Post
It feels like this is still a new adventure for us - taking photos, getting recipes up on the web and collecting ideas for growing kids into chefs- but when I sat down this evening to put together a post, I realized this is the 100th post for Talia's Table. That's kind of neat. I'm proud of my kids for hanging in there, and hanging out in the kitchen. We've covered a lot of territory between school, work and play, with some good eats on the way.
So here's a small collection of some favorite photos, and more recipes and ideas yet to come!


So here's a small collection of some favorite photos, and more recipes and ideas yet to come!


Hope you'll join us for the next 100 posts!
Subscribe to:
Posts (Atom)